Discovery using a Jumphost

Dear JDisc friends,
in many cases, firewalls are protecting specific areas of your network. Administrators often use so called jumphosts in order to access devices behind the firewall. They connect first to the jumphost and then use the jumphost to connect to the servers behind the firewall.
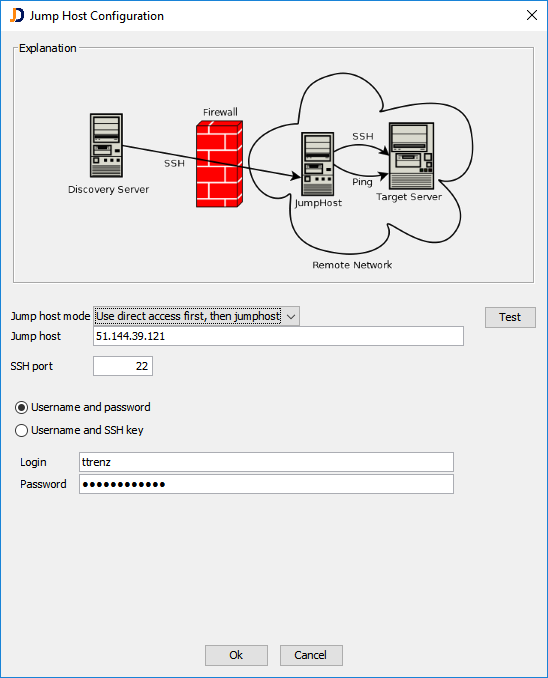
JDisc Discovery lets you configure a jumphost to scan specific networks or IP ranges. The discovery process uses the jumphost to ping the networks behind the firewall because in many cases, ping is also blocked by the firewall.
Configure the jumphost from the configuration dialog by adding a jumphost for a specific IP4 network or range. Click on the “Jumphost” button in order to configure a jumphost for the selected network.
Click on the Test button in order to test access to the jumphost. Once the jumphost is configured, the discovery connects first to the jumphost and performs pings from the jumphost to the target network. When scanning devices within a network with a configured jumphost, we connect first to the jumphost and then open from there a SSH to the target computer.
There are also two jumphost modes that you can use:
- try to access the target device directly first and use the jumphost only if that fails.
- always use the jumphost
Hope you find this feature useful. It will be released with build 4069…


