CyberArk certifies JDisc


Dear JDisc friends,
We are proud to announce that we have been certified by CyberArk! CyberArk is the global leader in Identity Security. Organizations use CyberArk to manage and secure the human and machine identities in their environment, many of which will have some form of privileged access. Part of securing these identities involves automatically rotating privileged passwords and credentials. Of course, rotating the passwords causes issues in discovery tools such as JDisc Discovery. It is simply not a viable solution to manually adjust the password in JDisc Discovery exactly at the time when CyberArk changes the password. Therefore, we have created an integration between JDisc Discovery and CyberArk.
CyberArk offers a well-designed REST API to retrieve information about the password safes, the defined passwords, and the current credentials (username & password). So whenever JDisc Discovery needs the current username and password to scan a computer, JDisc Discovery connects via CyberArk’s API to the CyberArk server and retrieves the current username and password. Important to know is that usernames and passwords are no longer stored within JDisc Discovery. Only the reference to the CyberArk account gets stored.
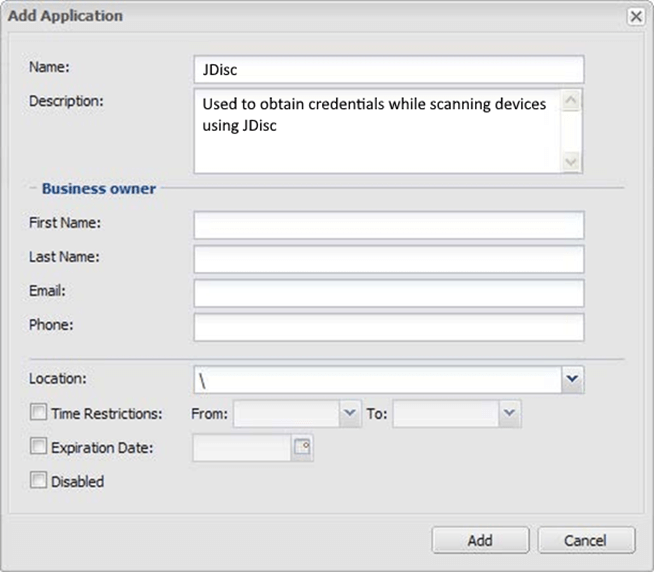
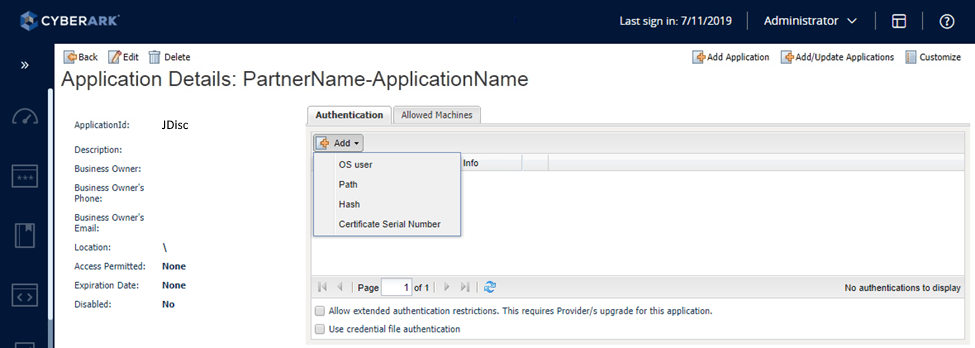
In order to use the integration, you need to configure the connection to the CyberArk component server. First, you need to configure a dedicated application within CyberArk. That will get you the application ID.
In addition, you need a client certificate and store the certificate’s serial number within CyberArk’s application configuration. This will associate the client certificate with the previously defined application.
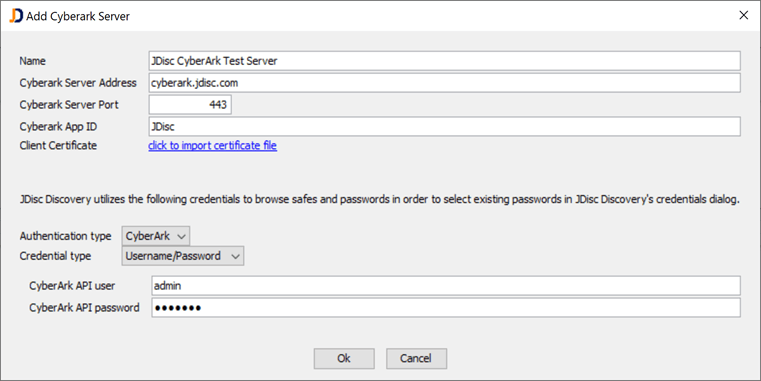
Once the application is properly configured within CyberArk, you need to connect JDisc Discovery with CyberArk. In order to define a new connection, you need to open Administration > Password Managers > CyberArk. You can add multiple CyberArk instances in case your environment is managed by multiple CyberArk installations. Click on the Add button to add a new connection:
The Name field is just a name for identifying the actual server. Then provide the CyberArk’s server address (IP address or hostname), the port, and the application ID which you defined within CyberArk. Finally, import the client certificate. The certificate is required to authenticate the JDisc application when querying current access credentials.
The lower section is optional. When you enter a CyberArk API user, then JDisc Discovery will be able to browse the list of safes, their subgroups, and the defined passwords. That makes it easy to simply choose an account within CyberArk by a simple selection. If you don’t provide the user, then you need to know the Safe name and the Object name for the credentials within CyberArk.
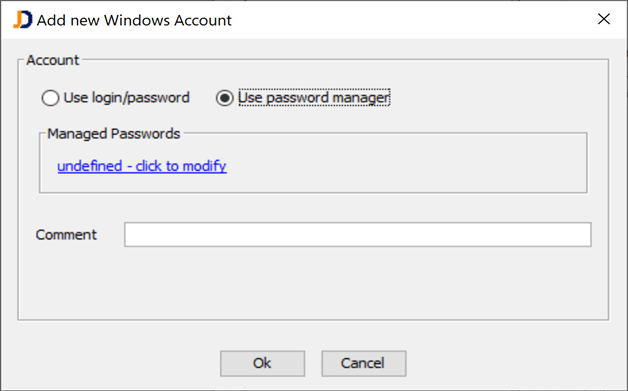
You can use the password managers once the connection has been successfully established. In most locations where you were entering a username/password, you will be able to select “Use password manager“.
In order to select the actual credentials, you need to click on the undefined – click to modify link.
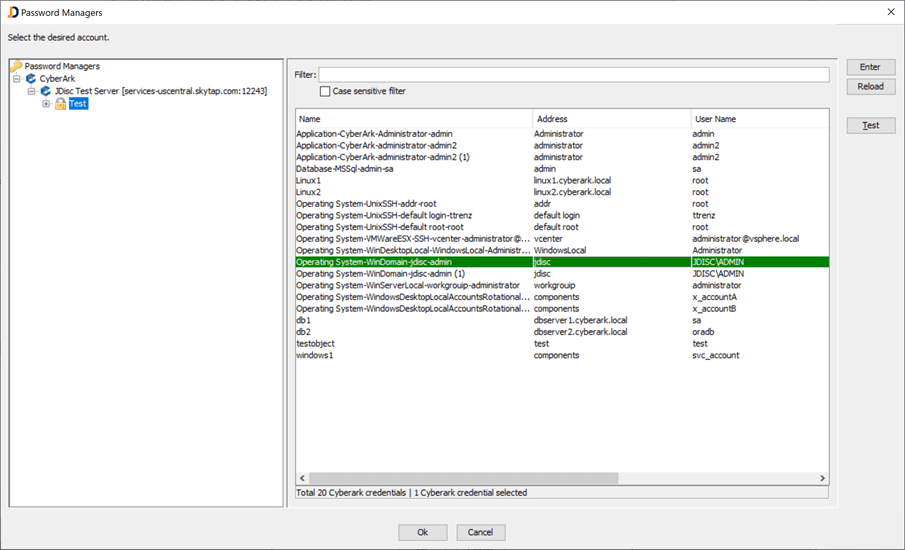
The password selection dialog offers on the top level the password manager solution (in this case CyberArk), then the next layer defines the actual server (remember, there can be many). Finally, the server contains safes and below the safes, there might be folders. Once you select a safe or folder the right area lists all passwords defined within the selected area. Finally, simply select the desired credentials and then this credential will be used at runtime when the device gets scanned.
We hope you like this feature and we will keep you posted on further development efforts in this area. We also have Microsoft’s LAPS and Tychotic on our roadmap for the next coming weeks.
Cheers,
Thomas

